
frame
Howdy, Stranger!
It looks like you're new here. If you want to get involved, click one of these buttons!
Sign In RegisterHowdy, Stranger!
It looks like you're new here. If you want to get involved, click one of these buttons!
Quick Links
Categories
- 1.4K All Categories
- 7.3K General
- 6.2K General Discussions
- 412 Feature Request/Bug Report
- 545 Sales Questions and Answers
- 54 Time4VPS Life
- 242 Help requests
- 244 Server management
- 390 Tutorials
- 68 Various Tutorials
- 71 Web hosting control panels
- 133 Performance and Security
- 29 Web Applications
- 64 Linux Applications
- 25 Windows VPS


How to Install Webmin on Rocky Linux 9, AlmaLinux 8 & 9, and CentOS 7
 Michail
Moderator
Michail
Moderator

Introduction
Webmin is a web-based interface for managing servers. With Webmin, you can perform tasks such as managing users, configuring services, editing configuration files, and monitoring system status through a web browser. It simplifies server administration by providing a graphical interface for performing tasks that would normally require using the command line.
In this guide we will install Webmin on RedHat based distributions (Rocky Linux 9, AlmaLinux 8 and 9, CentOS 7).
WARNING
CentOS 7 reached the EOL June 30, 2024:
https://blog.centos.org/2023/04/end-dates-are-coming-for-centos-stream-8-and-centos-linux-7/
Because of this, you may encounter some repository issues. We recommend that you reinstall another OS that has not yet reached EOL.
If you are using CentOS 7 and encounter a mirror issue, please check out this guide to resolve the problem.
This guide is not suitable for CentOS 7 on Storage VPS.
1. Update the system
First you need to update your system.
On Rocky LInux 9 and AlmaLinux run this command:
dnf update -y
On CentOS 7 run the following command:
yum update -y
2. Download Webmin repository script
Download Webmin repository script by running this command:
curl -o setup-repos.sh https://raw.githubusercontent.com/webmin/webmin/master/setup-repos.sh
Then run the Webmin script:
bash setup-repos.sh
3. Install Webmin
Now you can install Webmin. On Rocky LInux 9 and AlmaLinux run this command::
dnf install webmin -y
On CentOS 7 run this command:
yum install webmin -y
To verify successful installation, check Webmin status (it should be active):
systemctl status webmin
By default, the connection is not secured. To access Webmin via HTTPS, follow the steps outlined below.
4. Open port 80
First of all, you need to allow port 80 on your firewall. You can do this via IPtables or firewalld (if you use it):
IPtables:
To allow incoming traffic on port 80 (HTTP) using iptables, you need to add the following rule:
iptables -I INPUT -p tcp --dport 80 -j ACCEPT
Then run this command to save the changes:
service iptables save
After that, reload iptables:
systemctl restart iptables
Firewalld:
If you are using firewalld, run this command to allow incoming traffic on port 80:
firewall-cmd --add-port=80/tcp --permanent
Then reload firewalld:
firewall-cmd --reload
5. Secure Webmin with Let's Encrypt
Install epel repository and certbot by running these commands on Rocky Linux 9, AlmaLinux 8 and 9:
dnf install epel-release -y
dnf install certbot -y
On CentOS 7 run these commands:
yum install epel-release -y
yum install certbot -y
Next, you can use it to install SSL for your domain. You can generate it using your default VPS hostname or a domain that is pointed to your server's IP address. Run this command (change your_domain to your actual domain and write your email instead of [email protected]):
certbot certonly --standalone -d your_domain -m [email protected] --agree-tos
If everything is correct, the output will indicate where the certificate and key are stored:
Saving debug log to /var/log/letsencrypt/letsencrypt.log
..................
Successfully received certificate.
Certificate is saved at: /etc/letsencrypt/live/your_domain.ltd/fullchain.pem
Key is saved at: /etc/letsencrypt/live/your_domain.ltd/privkey.pem
Use these paths to combine the certificate and key into a .pem file (in our example, webmin.pem):
cat /etc/letsencrypt/live/your_domain.ltd/fullchain.pem /etc/letsencrypt/live/your_domain.ltd/privkey.pem > webmin.pem
Move the newly created webmin.pem file to the /etc/webmin/ directory, which stores Webmin data.
mv webmin.pem /etc/webmin/
Then open the Webmin configuration file:
vi /etc/webmin/miniserv.conf
Inside the file, find "keyfile" and replace its value with the path to the webmin.pem:
keyfile=/etc/webmin/webmin.pem
Restart Webmin to apply the new configuration changes:
systemctl restart webmin
6. Adjust Firewall Rules
IPtables:
If you are using IPtables, you'll need to allow Webmin to communicate over its default port (10000) and port 443:
iptables -A INPUT -p tcp --dport 10000 -j ACCEPT
iptables -A INPUT -p tcp --dport 443 -j ACCEPT
Also, deny insecure HTTP connections:
iptables -A INPUT -p tcp --dport 80 -j REJECT
Save changes:
service iptables save
Reload iptables:
systemctl restart iptables
Firewalld:
If you are using a firewall, run these commands::
firewall-cmd --add-port=10000/tcp --permanent
firewall-cmd --add-port=443/tcp --permanent
Then deny HTTP connections:
firewall-cmd --zone=public --remove-service=http --permanent
Then reload the firewalld:
firewall-cmd --reload
6. Test Webmin
You can now attempt to access Webmin via HTTPS in your web browser:
https://your_hostname:10000
You should see the login screen:
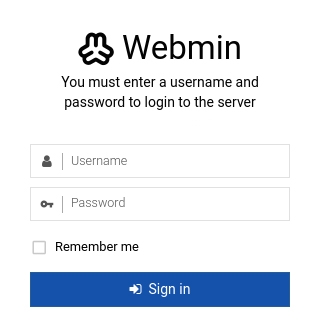
You can use the credentials of your root user or any other user created on your server.
Once connected, you can begin using Webmin:
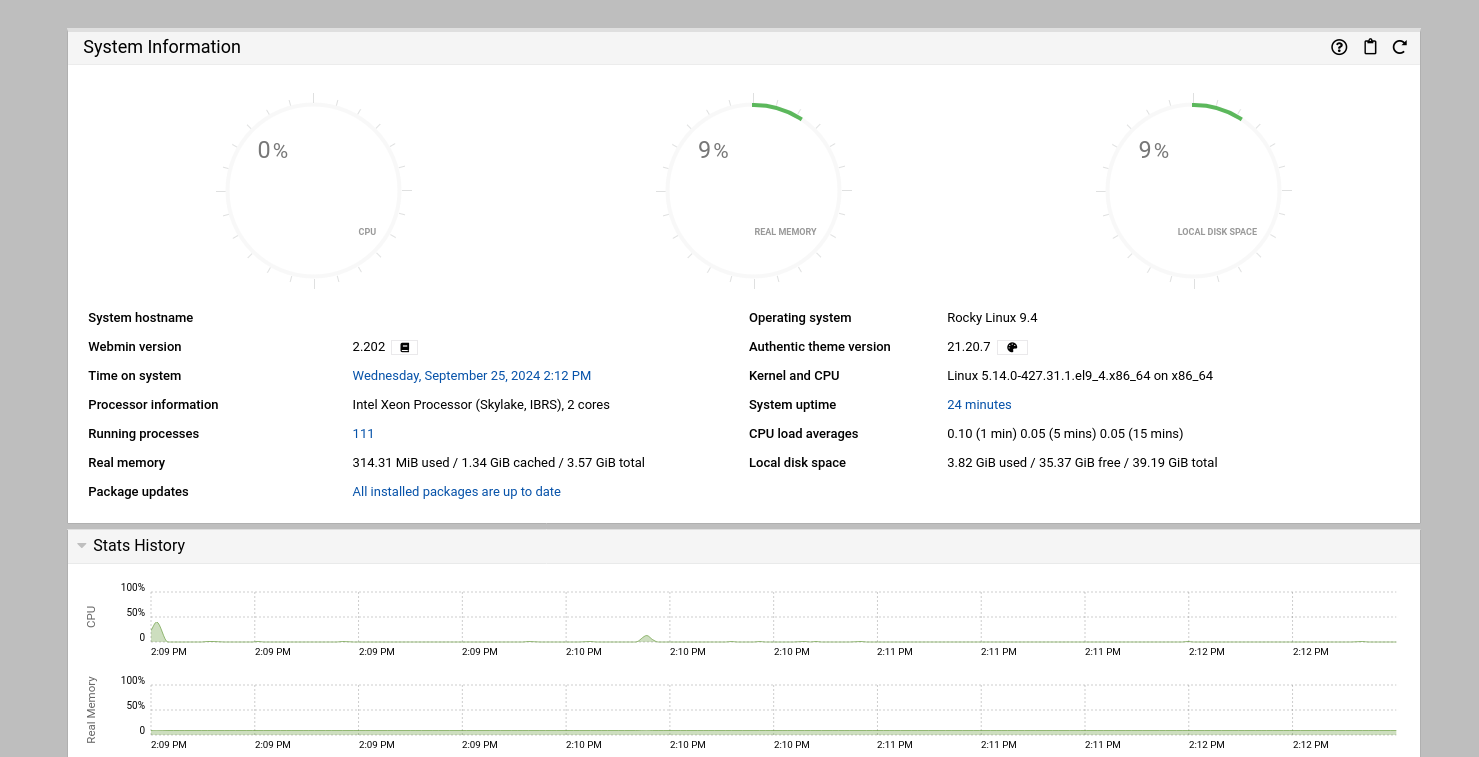
Now, you're ready to manage your server through Webmin!
foot
Feel free to join our constantly expanding community, participate in discussions, strengthen your knowledge on Linux and Windows server management!
© 2013 - 2025 Time4VPS. All rights reserved.
Comments
Tried this on Rocky Linux 9, but Webmin wouldn’t start and some dependencies failed. Issues started after a recent Windows update on my dual-boot setup anyone else run into this or found a fix?
Hello,
this guide was tested on our VPS environments (Rocky Linux 9, AlmaLinux 8 & 9, and CentOS 7). Since you mentioned a dual-boot with Windows and issues after a Windows update, it sounds like you're running Rocky Linux locally, not on our VPS platform.
Our setup doesn’t involve Windows, so the issue you’re seeing is likely related to your dual-boot configuration — e.g., time sync issues, fast startup interference, or mount state conflicts.
For accurate troubleshooting, I recommend checking system logs with journalctl -xeu webmin, verifying dependencies, and reviewing any recent system-level changes caused by the Windows update.