frame
Howdy, Stranger!
It looks like you're new here. If you want to get involved, click one of these buttons!
Sign In RegisterHowdy, Stranger!
It looks like you're new here. If you want to get involved, click one of these buttons!
Quick Links
Categories
- 1.4K All Categories
- 7.3K General
- 6.2K General Discussions
- 412 Feature Request/Bug Report
- 545 Sales Questions and Answers
- 54 Time4VPS Life
- 242 Help requests
- 244 Server management
- 390 Tutorials
- 68 Various Tutorials
- 71 Web hosting control panels
- 133 Performance and Security
- 29 Web Applications
- 64 Linux Applications
- 25 Windows VPS
Zimbra installation in CentOS
 Valentine
Member

Zimbra is an enterprise-class email, calendar and collaboration solution built for the cloud, both public and private. With a redesigned browser-based interface, Zimbra offers the most innovative messaging experience available today, connecting end users to the information and activity in their personal clouds.
WARNING
CentOS 7 reached the EOL June 30, 2024:
https://blog.centos.org/2023/04/end-dates-are-coming-for-centos-stream-8-and-centos-linux-7/
Because of this, you may encounter some repository issues. We recommend that you reinstall another OS that has not yet reached EOL.
If you are using CentOS 7 and encounter a mirror issue, please check out this guide to resolve the problem.
0. Preliminary requirements:
"CentOS 7" template installed on server;
Fully configured domain with MX record pointing to VPS;
"sendmail" removed from the server (yum remove sendmail -y).
1. Installing pre-requisites
yum install nano nc sysstat libtool-ltdl ntp -y2. Downloading and unpacking Zimbra
First we have to download Zimbra archive. Newest version can be found at: https://zimbra.org/download/zimbra-collaboration
wget https://files.zimbra.com/downloads/8.7.0_GA/zcs-8.7.0_GA_1659.RHEL7_64.20160628202714.tgzAfter download is completed unpack it:
tar xzf zcs-8.7.0_GA_1659.RHEL7_64.20160628202714.tgz3. Installing Zimbra
For Zimbra installation we have to move to Zimbra folder:
cd zcs-8.7.0_GA_1659.RHEL7_64.20160628202714And execute this command:
./install.sh --platform-overrideDuring installation process you will have to accept Zimbra license agreements by pressing Y and select packages for installation, we suggest you use a default values.
By continuing installation process you should reach a configuration section in which you should select "zimbra-store" option:
Address unconfigured (**) items (? - help) 7After this you should modify your admin user. For that select option 3:
Select, or 'r' for previous menu [r] 3After editing email you will also be prompted to set up admin user password:
Create admin user: [[email protected]] [email protected]You also might want to edit notification email in options 21 and 22:
Password for [email protected] (min 6 characters): [LC5WQQmdIQ] password
21) Version update notification email: [email protected]After configuring "zimbra-store" options return to previous menu:
22) Version update source email: [email protected]
Select, or 'r' for previous menu [r] rAnd apply your configuration:
Select from menu, or press 'a' to apply config (? - help) a4. Using Zimbra
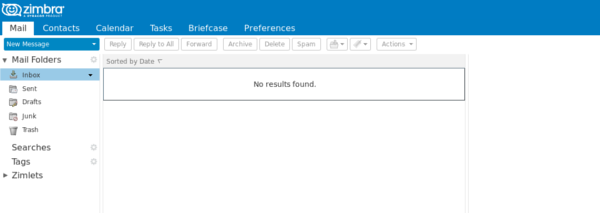
After installation is finished you will be able to access your Zimbra admin area in your browser:
https://mail.domain.eu:7071
And user area:
https://mail.domain.eu
For more information about Zimbra you can visit - https://zimbra.org/


