
frame
Howdy, Stranger!
It looks like you're new here. If you want to get involved, click one of these buttons!
Sign In RegisterHowdy, Stranger!
It looks like you're new here. If you want to get involved, click one of these buttons!
Quick Links
Categories
- 1.4K All Categories
- 7.3K General
- 6.2K General Discussions
- 412 Feature Request/Bug Report
- 545 Sales Questions and Answers
- 54 Time4VPS Life
- 242 Help requests
- 244 Server management
- 390 Tutorials
- 68 Various Tutorials
- 71 Web hosting control panels
- 133 Performance and Security
- 29 Web Applications
- 64 Linux Applications
- 25 Windows VPS


How to install Froxlor Ubuntu/Debian
 Eugene
Moderator
Eugene
Moderator

Froxlor is a lightweight and open-source web hosting control panel designed for managing domains, emails, and server configurations. It is ideal for system administrators, hosting providers, and businesses seeking an alternative to cPanel or Plesk. With its user-friendly interface and automation features, Froxlor simplifies server management while remaining resource-efficient.
- Lightweight & Fast – Minimal resource usage compared to other control panels.
- Customizable – Supports Apache, Nginx, and Lighttpd with flexible configurations.
- Multi-User Support – Separate roles for admins, resellers, and customers.
- SSL & Let's Encrypt Integration – Easy HTTPS setup for domains.
- Open-Source & Free – No licensing costs, with active community support.
Important considerations before installation
Before installing Froxlor, keep these key points in mind:
- Fresh OS Installation Required – Virtualmin is designed for a clean server. Installing it on a pre-configured system may cause conflicts.
- Supported Operating Systems – Compatible with Debian and Ubuntu
- System Resources – At least 1GB RAM (2GB+ recommended) and sufficient disk space for hosting websites.
1. Installation
1. Update your system
Run the following command to update all packages:
sudo apt update && sudo apt upgrade -y
2. Edit apt sources
In order to install Froxlor, we need to add the GPG keys and the repository to the APT source:
Ubuntu
2.1 sudo apt -y install apt-transport-https lsb-release ca-certificates curl gnupg
2.2 curl -sSLo /usr/share/keyrings/deb.froxlor.org-froxlor.gpg https://deb.froxlor.org/froxlor.gpg
2.3 sudo sh -c 'echo "deb [signed-by=/usr/share/keyrings/deb.froxlor.org-froxlor.gpg] https://deb.froxlor.org/ubuntu $(lsb_release -sc) main" > /etc/apt/sources.list.d/froxlor.list'
Debian
2.1 sudo apt -y install apt-transport-https lsb-release ca-certificates curl gnupg
2.2 curl -sSLo /usr/share/keyrings/deb.froxlor.org-froxlor.gpg https://deb.froxlor.org/froxlor.gpg
2.3 sudo sh -c 'echo "deb [signed-by=/usr/share/keyrings/deb.froxlor.org-froxlor.gpg] https://deb.froxlor.org/debian $(lsb_release -sc) main" > /etc/apt/sources.list.d/froxlor.list'
3. Update package list
Once again run the update system command, so all the changes with the sources are applied to the system:
sudo apt update && sudo apt upgrade -y
4. Install froxlor
Install froxlor together with all needed packages (e.g. webserver):
sudo apt install froxlor -y
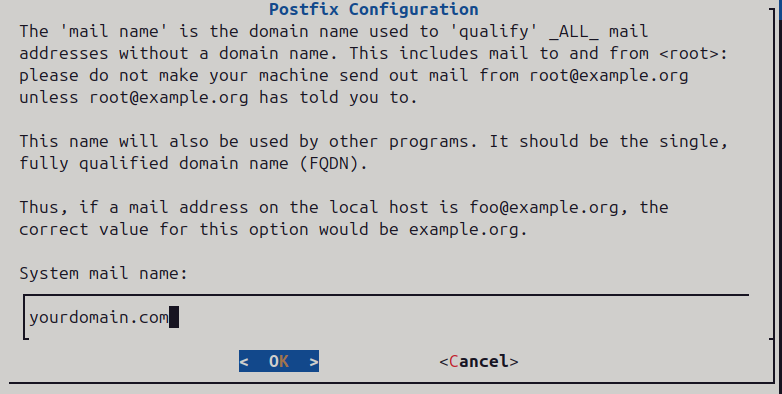
During the installation you will be prompted for Postfix configuration:

Hit enter key. After will be prompted another, choose "Internet Site" and write in either server's hostname or your domain, which is assigned to the server via rDNS.
If installed successfully, you should be able to see this message:

2. Configuring Froxlor
5. Create a database user
Log in to MySQL to create a new privileged user (e.g. froxroot) which is required for froxlor to add/delete customer mysql users and databases. You need to specify this user as the Privileged database user in the web-installer.
mysql -u root
Choose your own password for the database user instead of YourPassw0rd
5.1 CREATE USER 'froxroot'@'localhost' IDENTIFIED BY 'YourPassw0rd';
5.2 GRANT ALL PRIVILEGES ON *.* TO 'froxroot'@'localhost' WITH GRANT OPTION;
5.3 FLUSH PRIVILEGES;
5.4 EXIT;
The Unprivileged database user must not exist as it will be created by the installer for you. The default username is froxlor but of course you can use any valid username you like.
6. Install via Web-Installer
Access your preffered browser and open the Froxlor webpage with following link:
http://Servers-IP-Address/froxlor
The page should look like this:
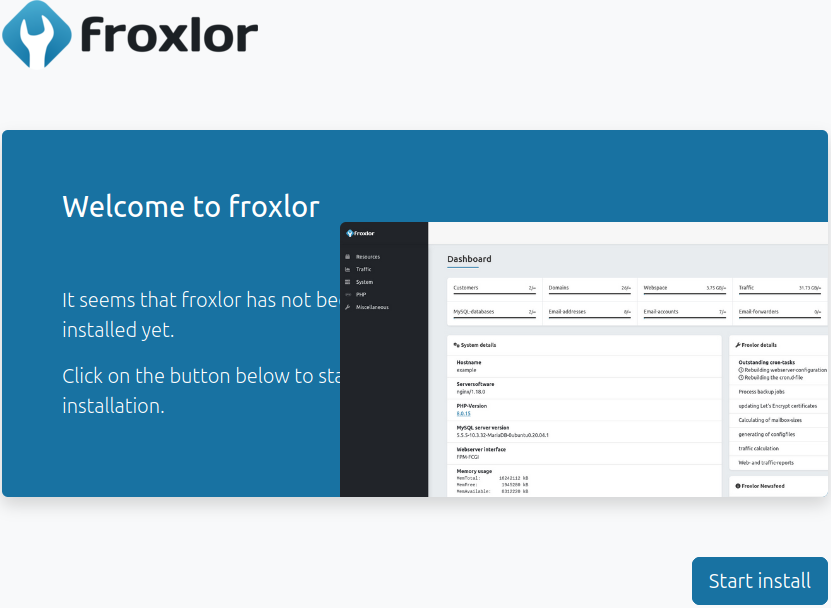
Press on "Start install" button. You should see only recommended settings which should be consider but can also be ignored. After reviewing, press on "Start installation".
6.1 Provide the credentials for database
You should be able to see the page, where you need to fill in the credentials for database access. Use the credentials, which you have set before in "MySQL" service.
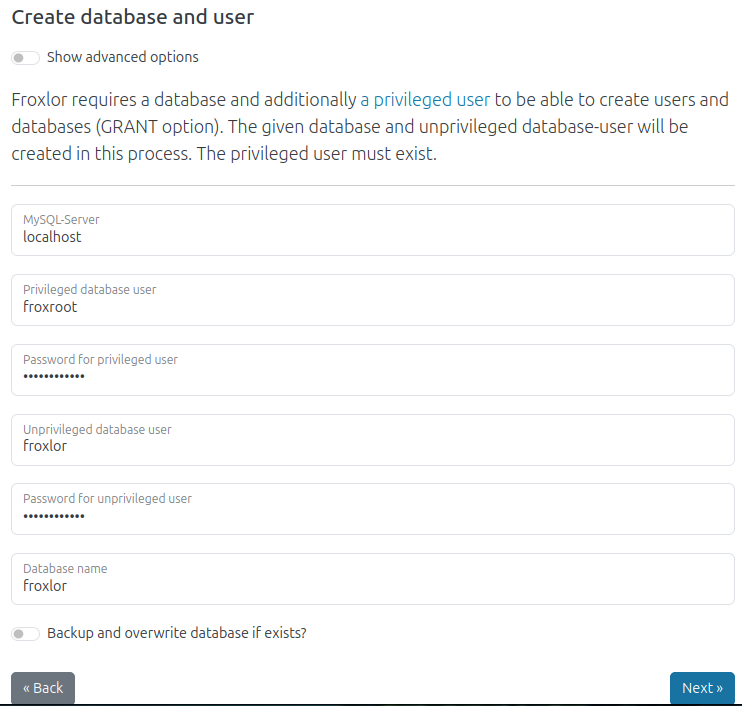
Once you are done, click "Next".
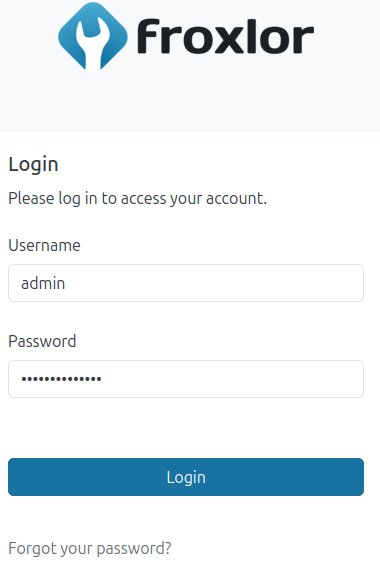
6.2 Create Administrator access
In the next section, use your own username and password to access the web interface as administrator.
6.3 System setup
In this section it is required to provide a server's hostname in section Server name. If you prefer, you can make any additional changes to the system for example using "Nginx" instead of "Apache" web server, otherwise just press "Next".
6.4 Finish setup
At the end, you will be required to run the command which is provided in the text section. It should be copy-pasted. It is mandatory to run the command as root user and it will overwrite any previously made configuration changes.
3. Access Froxlor
If everything is done correctly, you will receive the last message: All services have been configured
It means Froxlor is setup and ready to be used. You will be able to access it via given hostname/IP address:
http://Servers-Hostname.tld
http://Servers-IP-Address
 <b
<b
Conclusion
By following these steps, you have successfully installed and configured Froxlor on your Ubuntu/Debian server. With its intuitive interface and powerful features, you can now efficiently manage domains, users, and server settings. Ensure regular updates and backups to keep your system secure and optimized. Enjoy the flexibility and control Froxlor provides for your hosting needs!
foot
Feel free to join our constantly expanding community, participate in discussions, strengthen your knowledge on Linux and Windows server management!
© 2013 - 2025 Time4VPS. All rights reserved.