
frame
Howdy, Stranger!
It looks like you're new here. If you want to get involved, click one of these buttons!
Sign In RegisterHowdy, Stranger!
It looks like you're new here. If you want to get involved, click one of these buttons!
Quick Links
Categories
- 1.4K All Categories
- 7.3K General
- 6.2K General Discussions
- 412 Feature Request/Bug Report
- 545 Sales Questions and Answers
- 54 Time4VPS Life
- 242 Help requests
- 244 Server management
- 390 Tutorials
- 68 Various Tutorials
- 71 Web hosting control panels
- 133 Performance and Security
- 29 Web Applications
- 64 Linux Applications
- 25 Windows VPS


How to Install ownCloud on AlmaLinux 9 and Rocky Linux 9
 Michail
Moderator
Michail
Moderator
Introduction
OwnCloud is a robust open-source platform that enables you to set up your own cloud storage for storing and sharing files. It provides an excellent alternative to commercial cloud services, offering complete control over your data.
In this guide, we will provide a comprehensive walkthrough for installing and configuring ownCloud on AlmaLinux 9 and Rocky Linux 9.
IMPORTANT WARNING:
Before proceeding with the installation of ownCloud, be aware that if SELinux is enabled, it will block access to ownCloud. To ensure a smooth installation and usage, you must disable SELinux or set it to "Permissive" mode.
SELinux (Security-Enhanced Linux) is a mandatory access control (MAC) system for Linux. It enforces strict security policies that restrict what processes can access, even if they are running as root.
However, if you are using a well-configured firewall, then disabling SELinux might not expose you to risk.
You can check SELinux status by running this command:
getenforce
If it returns Disabled, then SELinux is turned off, and you can install your ownCloud.
If the status is Enforcing, then SELinux is actively enforcing security policies (SELinux enabled).
Permissive – SELinux is enabled but only logs violations instead of enforcing them. You can keep it as permissive and install ownCloud.
To change SELinux status, open the SELinux configuration file with a text editor:
nano /etc/selinux/config
Find the line:
SELINUX=enforcing
Change "enforcing" to "disabled" or "Permissive.
Save file and exit.
Next, reboot the system:
reboot
Once you access the server again, recheck the SELinux status and make sure it's disabled.
Prerequisites
Apache: Before installing OwnCloud, ensure that the Apache web server is installed. You can follow our guide for detailed instructions.
MariaDB: MariaDB is required to create a database for OwnCloud. To install MariaDB, you can refer to our guide.
Please note: OwnCloud supports PHP 7.4, but does not support newer PHP versions (such as PHP 8.0 and above). Therefore, in this guide, we will install PHP 7.4. PHP 7.4 reached its end of life (EOL) in 2022, so please consider this before proceeding with the OwnCloud installation.
Additionally, it is highly recommended to back up your server before installing OwnCloud or any other software, especially if you have custom configurations on your VPS.
Installation Guide
1. Update your system
Make sure your system is up to date by executing the following command:
dnf update -y
2. Create Database For Owncloud
To create a database for your ownCloud, first access MariaDB as the root user:
mysql -u root -p
Next, enter the following command to create the ownCloud database:
CREATE DATABASE owncloud;
After that, grant all privileges to the ownCloud user for the ownCloud database by running the following command (replace 'New_Password' with your chosen password):
GRANT ALL PRIVILEGES ON owncloud.* TO 'owncloud'@'localhost' IDENTIFIED BY 'New_Password';
Flush privileges and exit:
FLUSH PRIVILEGES;
EXIT;
3. Install EPEL and Remi Repository
Run these commands to install EPEL and Remi:
dnf install https://dl.fedoraproject.org/pub/epel/epel-release-latest-9.noarch.rpm
dnf install https://rpms.remirepo.net/enterprise/remi-release-9.rpm
4. Install PHP
dnf module install php:remi-7.4
Install qequired PHP modules for owncloud:
dnf install php-curl php-gd php-intl php-json php-ldap php-mbstring php-mysqlnd php-xml php-zip php-opcache
Verify the installation by checking PHP version:
php -v
The output should look like this:

5. Download ownCloudinstallation files
After that, go to the official OwnCloud website and copy the download link for the .zip archive. Right-click on "Download .ZIP" and select "Copy link address" to get the direct download link.
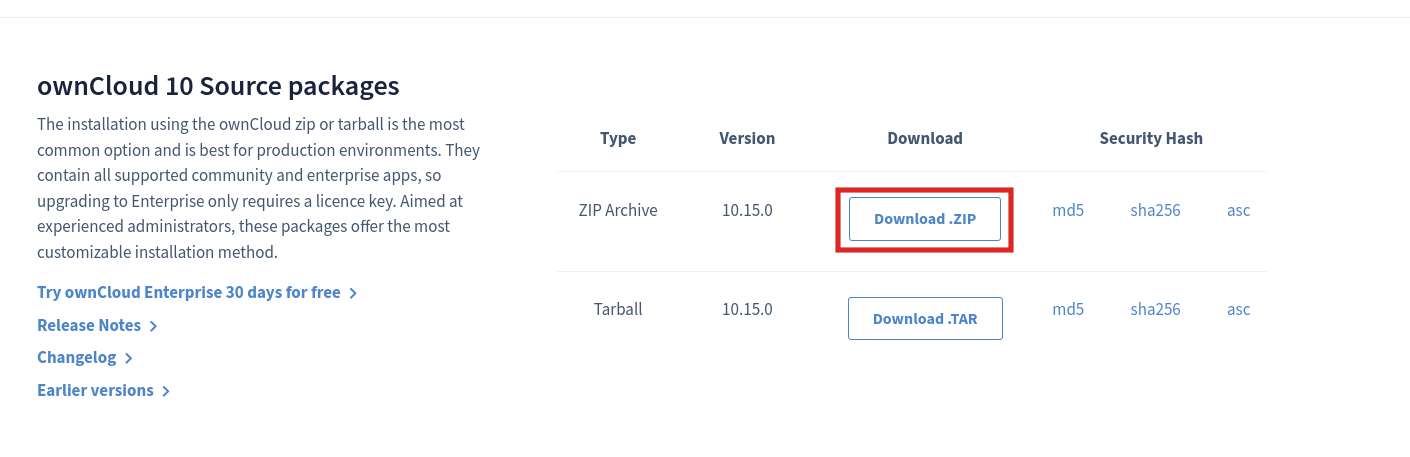
The download link will vary depending on the version of OwnCloud. As of writing this tutorial, the latest version available is 10.15.0.
Use the wget command together with the copied link:
dnf install wget
wget https://download.owncloud.com/server/stable/owncloud-complete-20240724.zip -P /tmp
Extract the installation files:
dnf install unzip
unzip /tmp/owncloud-complete-20240724.zip -d /var/www
6. Create Virtual Host file for ownCloud
Create new Virtual Host file for OwnCloud (use your preferred text editor):
nano /etc/httpd/conf.d/owncloud.conf
Inside the file, paste this content:
Alias /owncloud "/var/www/owncloud/"

<Directory /var/www/owncloud/>
   Options +FollowSymlinks
   AllowOverride All

<IfModule mod_dav.c>
   Dav off
   </IfModule>

   SetEnv HOME /var/www/owncloud
   SetEnv HTTP_HOME /var/www/owncloud

 </Directory>
Save changes and exit.
7. Create Folders for ownCloud and set permissions
Create folders to run ownCloud:
mkdir -p /var/www/owncloud/data
mkdir -p /var/www/owncloud/apps-external
Specify permissions:
chown -R apache:apache /var/www/owncloud
chmod -R 770 /var/www/owncloud
After setting up the correct permissions, restart Apache by running the following command:
systemctl restart httpd
8. Access ownCloud
To access your OwnCloud, open your web browser and enter your server's IP address followed by /owncloud.
server_ip_address/owncloud
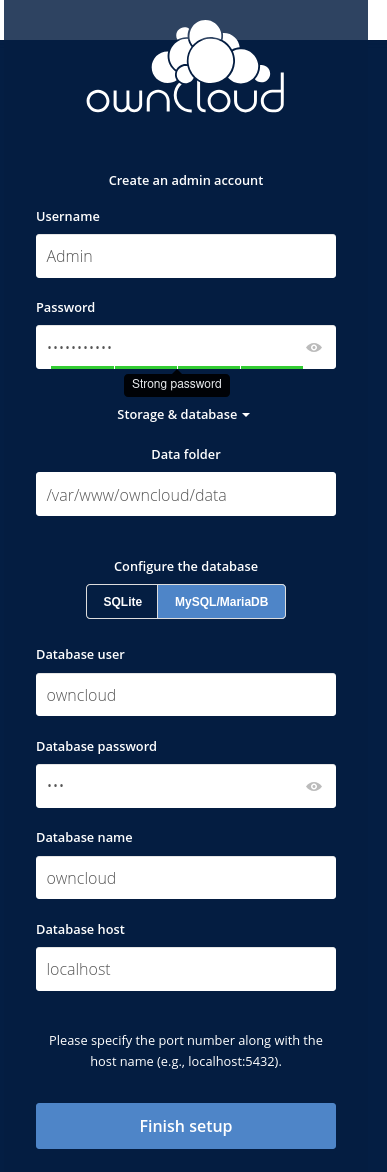
Next you need to create an administrator account and set a secure password.
Then select click "Storage & database".
Leave the "Data Folder" path as set by default.
Choose MySQL/MariaDB as the database type, then input the database name, username, and the password you previously set. Finally, click Finish Setup to complete the process.
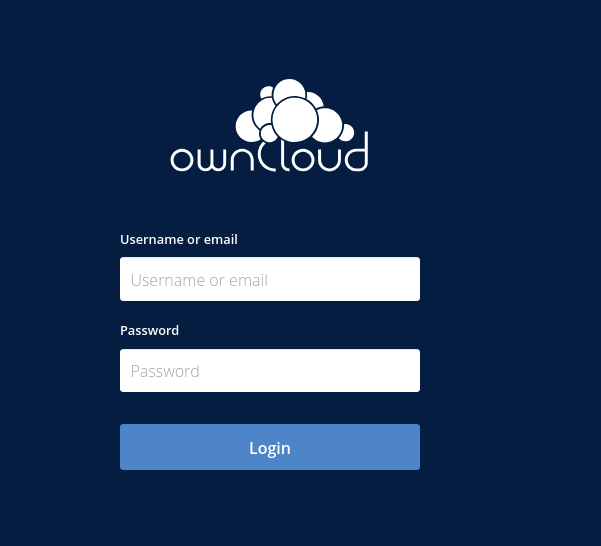
Next enter your administrator account username and password to access Owncloud dashboard:
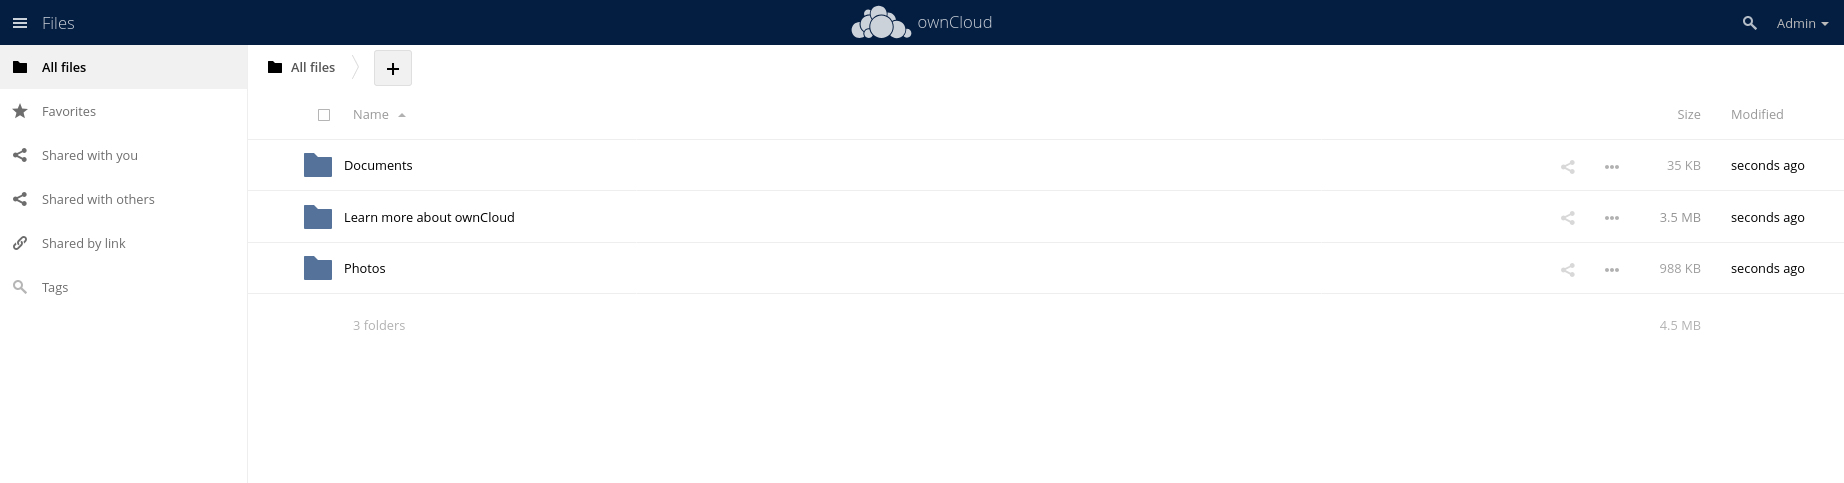
Congratulations! You are now ready to start using ownCloud!
foot
Feel free to join our constantly expanding community, participate in discussions, strengthen your knowledge on Linux and Windows server management!
© 2013 - 2025 Time4VPS. All rights reserved.