frame
Howdy, Stranger!
It looks like you're new here. If you want to get involved, click one of these buttons!
Sign In RegisterHowdy, Stranger!
It looks like you're new here. If you want to get involved, click one of these buttons!
Quick Links
Categories
- 1.4K All Categories
- 7.3K General
- 6.2K General Discussions
- 412 Feature Request/Bug Report
- 545 Sales Questions and Answers
- 54 Time4VPS Life
- 242 Help requests
- 244 Server management
- 390 Tutorials
- 68 Various Tutorials
- 71 Web hosting control panels
- 133 Performance and Security
- 29 Web Applications
- 64 Linux Applications
- 25 Windows VPS
How to Install aaPanel
 Michail
Moderator
Introduction
aaPanel is an open-source server control panel used to manage a web hosting environment. It is a alternative to other well-known control panels including cPanel, VestaCP, etc. It comes with a simple and user-friendly web interface that simplifies your work in managing your web hosting environment. It offers a rich set of features including file manager, SSL, Cron, firewall, FTP, mail, databases,DNS, and more.
This guide will demonstrate how to install aaPanel on your VPS.
Supported OS
Debian 11, 12
Ubuntu 20.04, 22.04
AlmaLinux 9.
Rocky Linux 9.
Please note. aaPanel can also be installed on AlmaLinux 8 and CentOS 7. However, these distributions have reached their End of Life (EOL) and are no longer supported, so we do not recommend using them for aaPanel installation. For Red Hat-based systems, we recommend opting for AlmaLinux 9 or Rocky Linux 9.
Important warning
It is highly recommended to backup your server before installing aaPanel if you already have custom configurations. Installing aaPanel may modify certain system settings or install software that could potentially interfere with your existing setup. A backup ensures that you can restore your server to its previous state if anything goes wrong during the installation process.
Installation Guide
1. Update the system
First, make sure to update the system,
On Ubuntu/Debian run the following command:
apt update && apt upgrade -y
On RedHat-based distributions (AlmaLinux/RockyLinux) run this command:
dnf update -y
2. Install Wget
wget is a command-line utility used to download files from the internet. We need it to get and run the wget installation script.
Run this command on Ubuntu/Debian to install wget:
apt install wget
On RedHat-based distributions (AlmaLinux/RockyLinux), run the following command:
dnf install wget
3. Install aaPanel
To install aapanel, run the following command:
wget -O install.sh http://www.aapanel.com/script/install-ubuntu_6.0_en.sh && bash install.sh aapanel
While running the script, you’ll be prompted to confirm the installation of aaPanel in the /www directory. Press Y and then Enter to proceed.
Installation will take some time.
After the installation is complete, the output will display the default username and password. Be sure to save these credentials for future use.

4. Connect to aaPanel
The installation script output will also provide you the link to access your aapanel (aaPanel internal address, the one with ipv4). Enter this link in your browser.
The first time you will receive a notification about an unsecured connection. In the case of aaPanel, this is normal and you can continue without any problems.
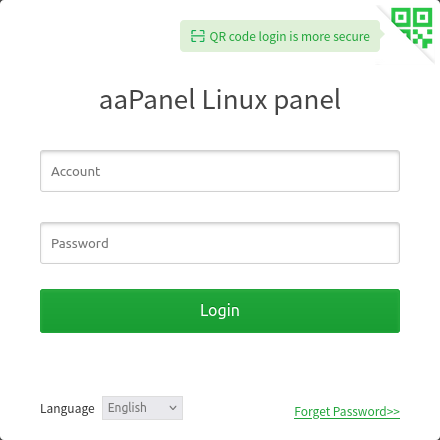
The aaPanel login page will appear. Enter the credentials you saved in the previous step to proceed.
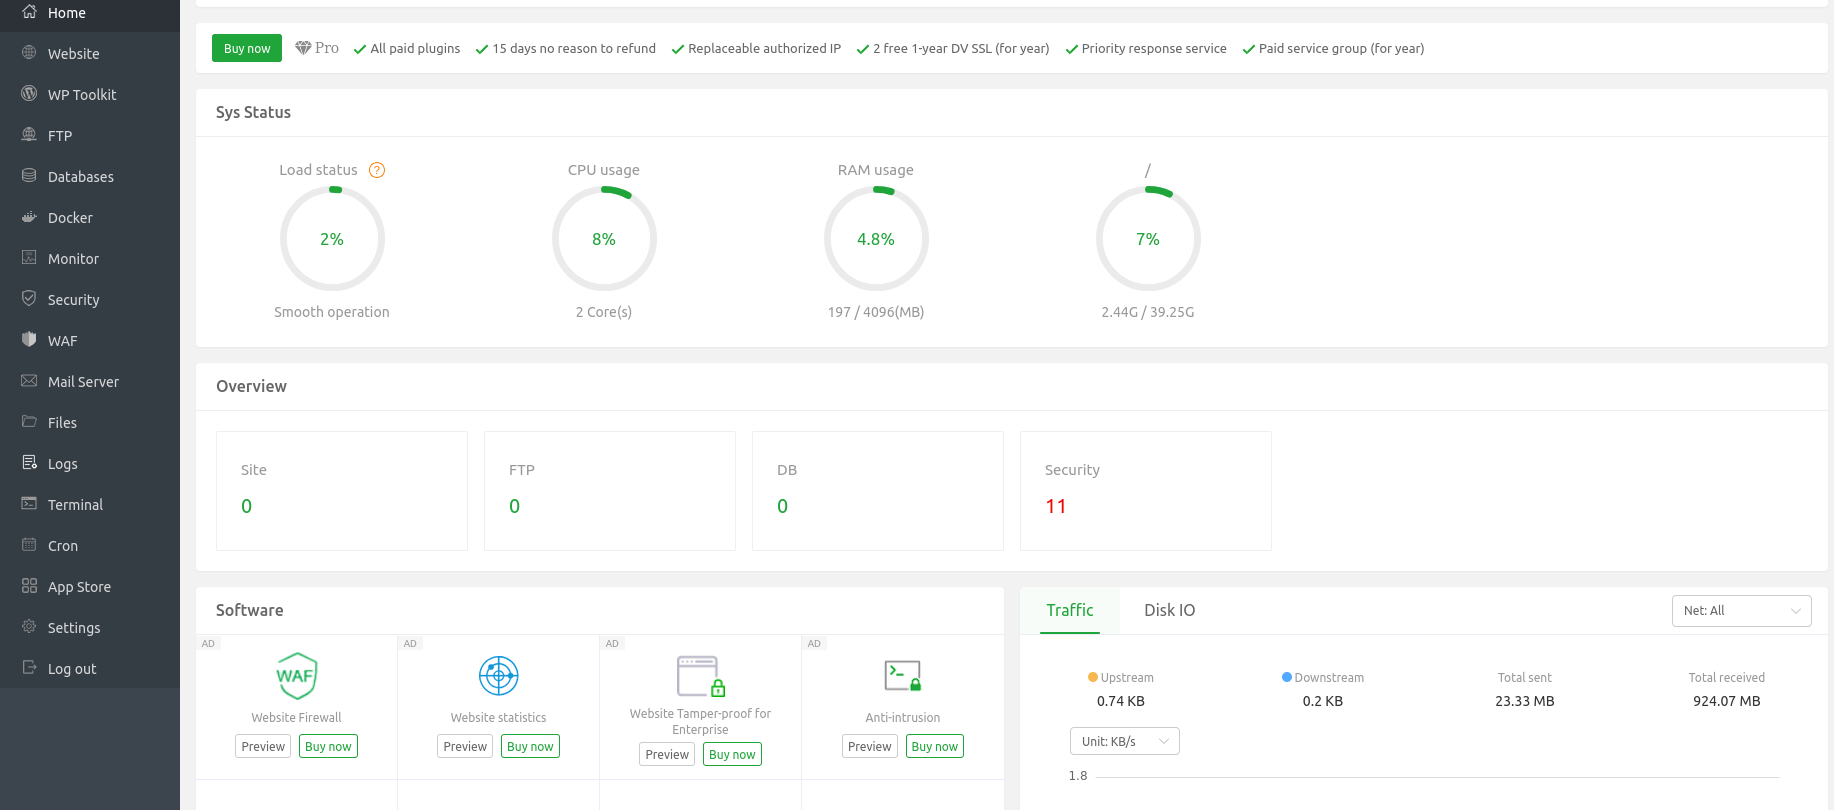
After connecting, the aaPanel dashboard will appear. An installation wizard will launch to install LAMP or LNMP on aaPanel:

Depending on your needs, you can click the “One Click” button. You will be prompted to select various configuration options, including the web server (Apache, Nginx, or OpenLiteSpeed), PHP version, and database (MySQL, MariaDB, or PostgreSQL). Follow the prompts to make your choices. You can also close the wizard if you don't need these components at the moment.
Next, you'll access the dashboard, where you can monitor and manage your server.
Post-Installation Configuration
1. Change the default admin password
It is strongly advised to change the default aaPanel password. After connecting to aaPanel, navigate to Settings:
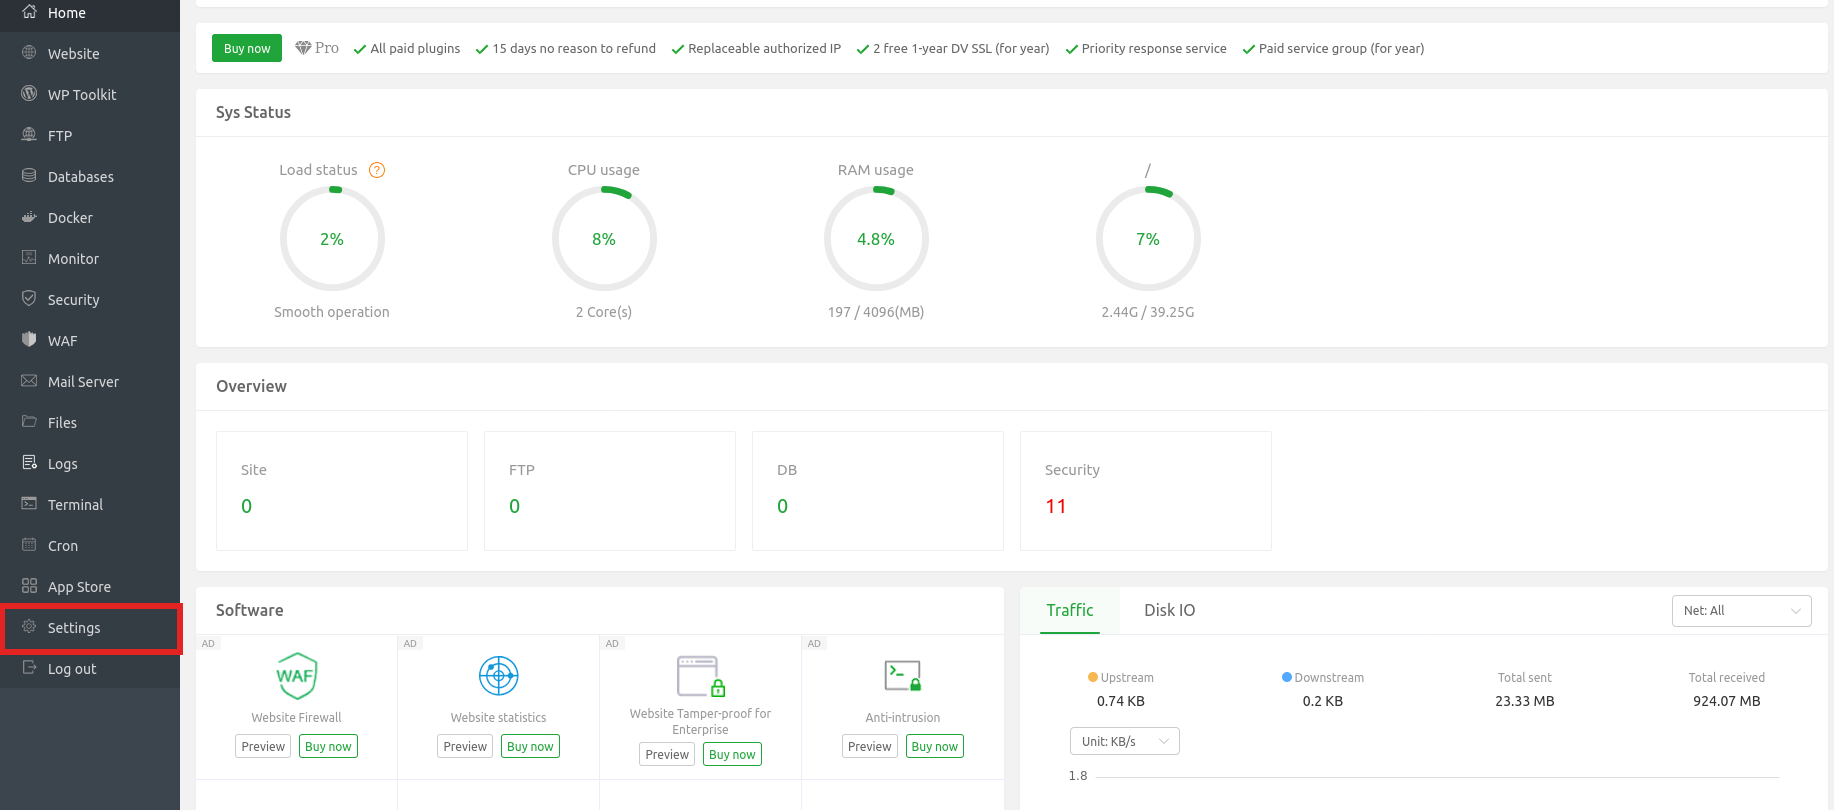
In the first section, "Global," you can modify various settings, including the username and password. Click Modify to make changes.

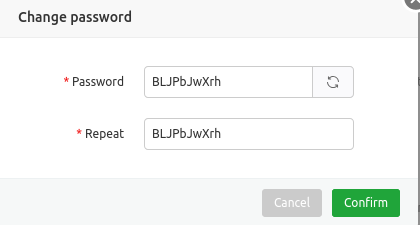
AaPanel will automatically generate a new strong password for you. To regenerate it, simply click the "Reload" button. Repeat generated password and click Confirm.
2. Change the default port
Changing the default aaPanel port can also enhance your server's security. You can always change your port via the aaPanel dashboard. Navigate to the Settings and select "Security" section:
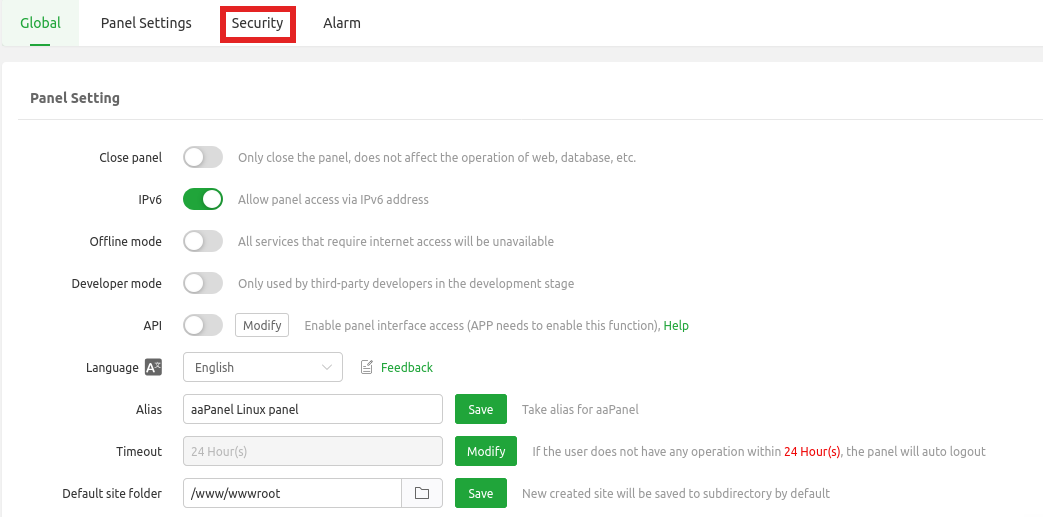
In the "Security" section, click Modify next to "Panel port":

You can enter any port number within the range 8888-65535:
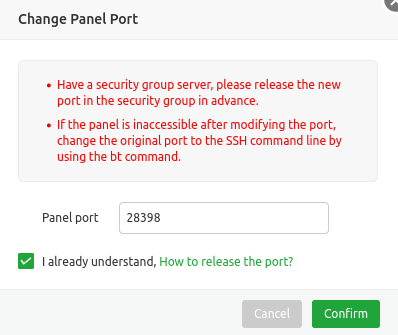
3. Change the default timeout duration
By default aaPane timeout duration set to 24 hours. Set a shorter timeout period to automatically log out active users if there is no activity in the control panel. Navigate to the Settings---->Global section and click Modify next to "Timeout"
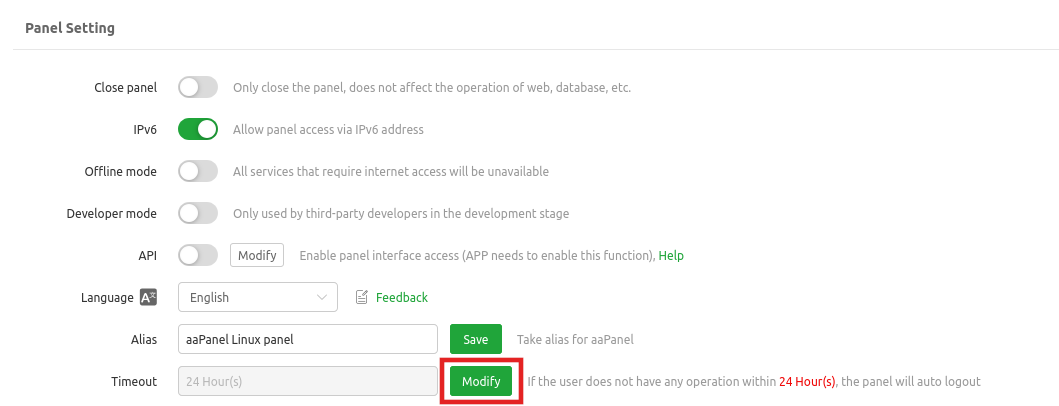
Click "Custom", enter the value for new timeout duration and click "Confirm":
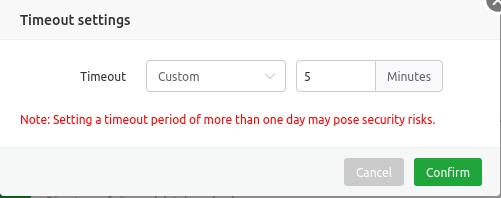
aaPanel pricing
While the core functionality of aaPanel is free, there are some premium plugins and support options available for purchase. For more information about pricing and aaPanel plans, you can check the official aaPanel website.
Conclusion
In this guide, we walked through the process of installing aaPanel and enhancing its security by changing the default password, modifying the panel port, and adjusting the timeout duration. These steps help secure your server and prevent unauthorized access. You can now securely manage your server through the aaPanel dashboard!


