
frame
Howdy, Stranger!
It looks like you're new here. If you want to get involved, click one of these buttons!
Sign In RegisterHowdy, Stranger!
It looks like you're new here. If you want to get involved, click one of these buttons!
Quick Links
Categories
- 1.4K All Categories
- 7.3K General
- 6.2K General Discussions
- 412 Feature Request/Bug Report
- 545 Sales Questions and Answers
- 54 Time4VPS Life
- 242 Help requests
- 244 Server management
- 390 Tutorials
- 68 Various Tutorials
- 71 Web hosting control panels
- 133 Performance and Security
- 29 Web Applications
- 64 Linux Applications
- 25 Windows VPS


How to install XRDP on Rocky Linux 9
 Michail
Moderator
Michail
Moderator
Introduction
XRDP is a software that allows Linux users to connect to a remote desktop via Remote Desktop Protocol (RDP). It provides a graphical interface similar to what users see on their screen when working directly on their computer. With XRDP, you can connect to a Linux server from a Windows computer.
In this tutorial, we will install XRDP on Rocky Linux 9.
Installation Guide
1. Update the system
Run this command to update your system:
dnf update -y
2. Install the EPEL repository
Next, install the EPEL repository:
dnf install -y epel-release
3. Install Xrdp
You can now install XRDP by running the following command:
dnf install -y xrdp tigervnc-server
4. Enable Xrdp
After installation, you need to enable XRDP:
systemctl enable xrdp
For the changes to take effect, restart XRDP:
systemctl restart xrdp
5. Install Xfce
Now, we need to install a graphical interface to access the server through XRDP. In this guide, we will install Xfce.
To install Xfce, run the following command:
dnf groupinstall -y "Xfce"
Next, you need to create an Xclients file to start the desktop environment.
Run this command to create and open the file:
vi ~/.Xclients
Then copy and paste this content into the file:
 #!/bin/bash
 XFCE="$(which xfce4-session 2>/dev/null)"
 exec "$XFCE"
Save the file and exit (press "Esc", then type :wq and click "Enter").
Next, make the file executable by running this command:
chmod +x .Xclients
For the changes to take effect, restart XRDP again:
systemctl restart xrdp
6. Enable RDP port
Next, you need to allow access through the default RDP port - 3389.
To enable port 3389 in iptables, run the following command:
iptables -I INPUT -p tcp -m tcp --dport 3389 -j ACCEPT
After that, save the changes:
service iptables save
If you use firewalld as your firewall, run this command:
firewall-cmd --add-port=3389/tcp --permanent
After that, reload the firewalld:
firewall-cmd --reload
7. Access your server through RDP
To check if XRDP is enabled successfully, enter the following command:
systemctl status xrdp.service
The output should look like this:
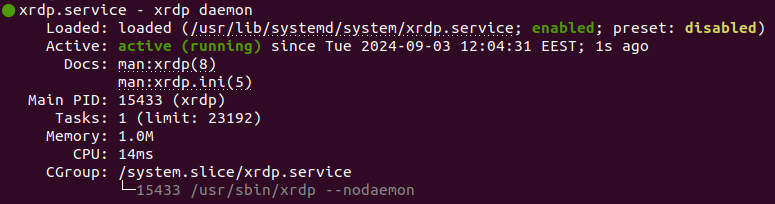
XRDP is configured, so now you can test the connection via RDP.
Windows computer:
On Windows computers, you can use the Remote Desktop application. Open it and enter the following details:
Computer: Your_server_IP
Username: root
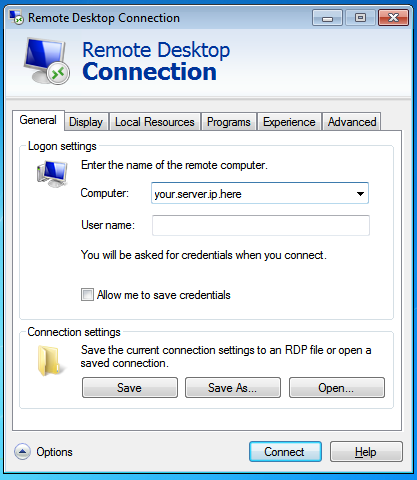
Click "Connect" to continue and you will see login page, where you need to enter a password of your root user:
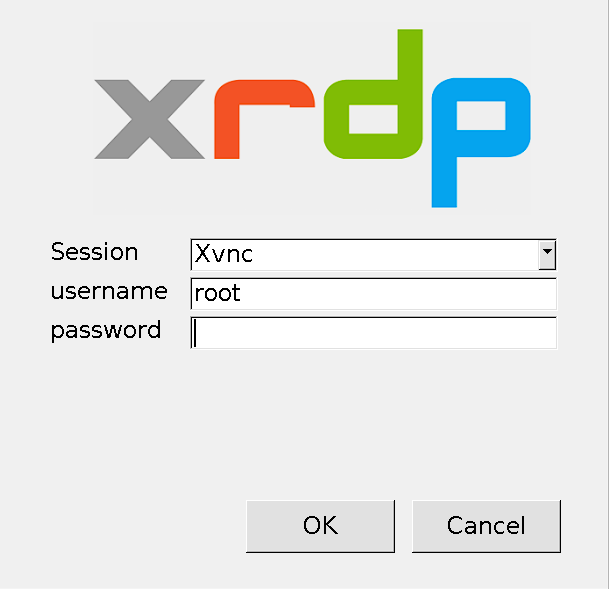
Please note, that you can't copy/paste in this window. So you need to type password manually. You can save your password for future logins by clicking "Allow me to save credentials" in the Remote Desktop window.
Linux:
You can also connect via RDP from a Linux computer. To do this, you will need the rdesktop application.
To install it on Ubuntu/Debian, run these commands:
apt-get update
apt-get install rdesktop
To install it on CentOS/AlmaLinux/Rocky Linux 9, run these commands:
yum update
yum install rdesktop
To connect to the server, run this command:
rdesktop -u root -p PASSWORD -g 1024x768 YOUR_SERVER_IP
Change the "PASSWORD" and "YOUR_SERVER_IP" to your actual password and server's IP.
You can change the resolution by updating the "-g 1024x768" parameter.
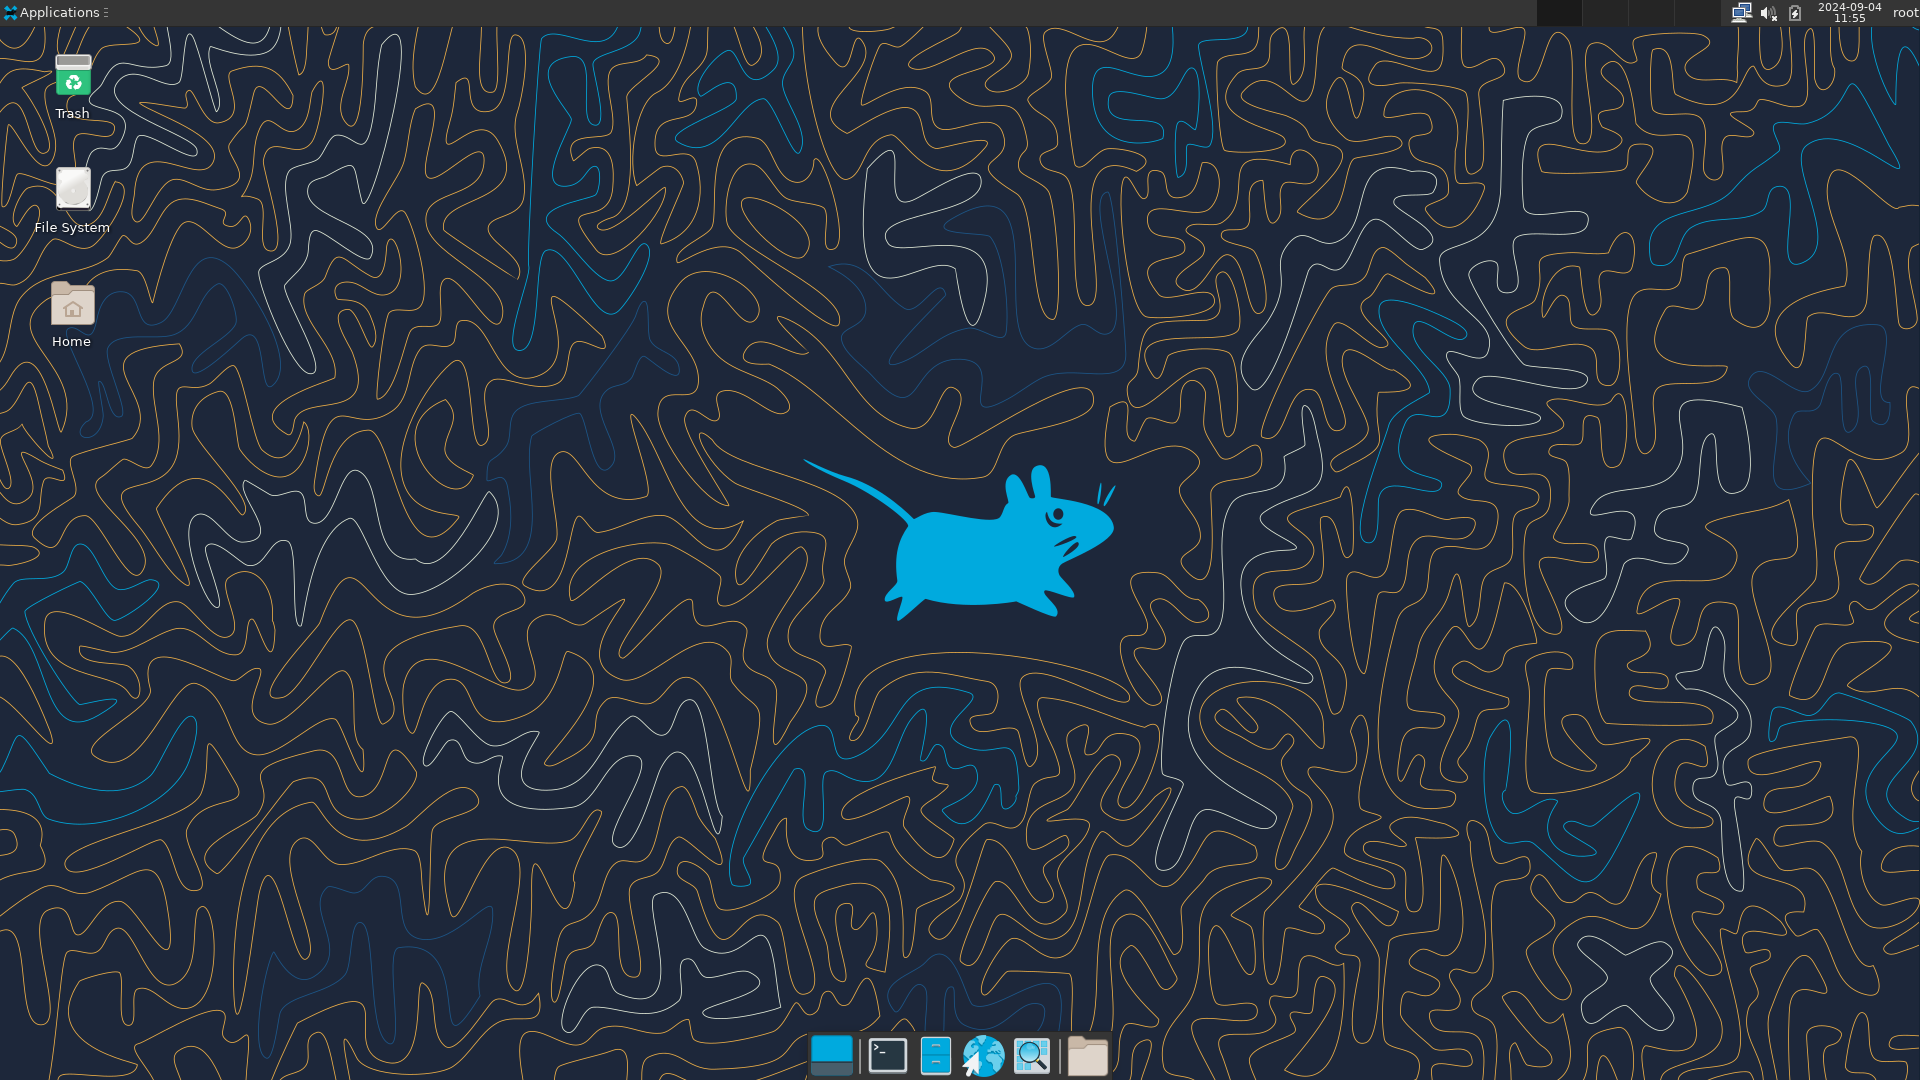
That's it! Now you can access your server through RDP and manage the server via a graphical interface.
foot
Feel free to join our constantly expanding community, participate in discussions, strengthen your knowledge on Linux and Windows server management!
© 2013 - 2025 Time4VPS. All rights reserved.
Comments
Thank you for sharing. I was looking for the same.