
frame
Howdy, Stranger!
It looks like you're new here. If you want to get involved, click one of these buttons!
Sign In RegisterHowdy, Stranger!
It looks like you're new here. If you want to get involved, click one of these buttons!
Quick Links
Categories
- 1.4K All Categories
- 7.3K General
- 6.2K General Discussions
- 412 Feature Request/Bug Report
- 545 Sales Questions and Answers
- 54 Time4VPS Life
- 242 Help requests
- 244 Server management
- 390 Tutorials
- 68 Various Tutorials
- 71 Web hosting control panels
- 133 Performance and Security
- 29 Web Applications
- 64 Linux Applications
- 25 Windows VPS


[Nextcloud] NextCloud 20 installation on Ubuntu 20.04
 Ievaz
Administrator
Ievaz
Administrator
Nextcloud is an open-source cloud storage tool for sharing and hosting files. This tool is usually used the same way as other similar cloud-based tools, for example, Google Drive, Dropbox, ownCloud, and other similar cloud-based solutions.
This software is written in JavaScript and PHP, and it supports PostgreSQL, MySQL, SQLite, Oracle Database.
We already have a tutorial on how to install Nextcloud on CentOS 7 with MariaDB and PHP. However, we have prepared another for Ubuntu 20.04.
So in this tutorial, I will explain how to install Nextcloud 20 software on a server with an installed Ubuntu 20.04 operating system.
Installation
- Firstly, before installing any package on your server, you should update all system packages just in case if some of them are not updated:
sudo apt update
sudo apt upgrade
- Then, you need to install Nextcloud with down below provided command:
sudo snap install nextcloud
The output message should look like this:

Nextcloud is being installed using the Snap packaging system, which is available on Ubuntu 20.04 by default. This packaging system allows installing wanted tools automatically with required packages.
- After downloading and installing Nextcloud, you can check the result with this command:
snap changes nextcloud
The output should look like this:

- Now, you will need to create an administrative account on the command line. It will help avoid a small window where the registration page would be accessible for anyone visiting your server's hostname or IP address.
Here is the command which you need to use for that:
sudo nextcloud.manual-install username password
Username and password you need to replace with the values you will access your NextCloud account.
Then should be provided the message that Nextcloud was configured successfully:

- You will need to adjust some things that those requests could be accepted that you could access your Nextcloud with domain/subdomain or IP address.
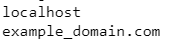
Now, if you would check, the service responds only to requested which were made to the 'localhost':
sudo nextcloud.occ config:system:get trusted_domains
- For adding your server’s domain name or IP address, you will need to replace in the provided command the value 'example_domain.com' to your wanted:
sudo nextcloud.occ config:system:set trusted_domains 1 --value=example_domain.com

Again with this command, you can check if the domain/subdomain or IP address was added to the trusted domains list:
sudo nextcloud.occ config:system:get trusted_domains
The output should look like this:
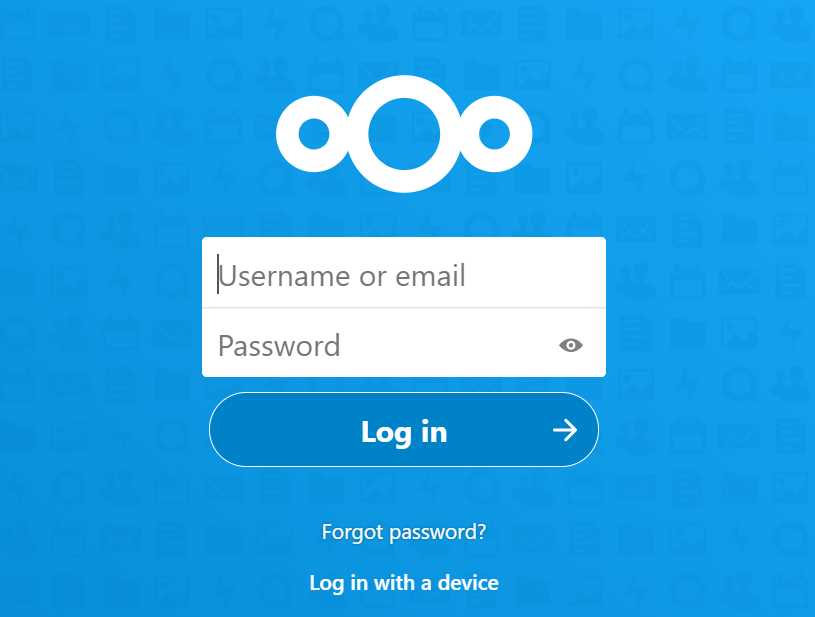
So now, you can visit your server’s domain name or IP address in your web browser, enter your administrative user username and password, which you set up before and click 'Log in'.
For more information about Nextcloud, you can find it in their official documentation and forum.
foot
Feel free to join our constantly expanding community, participate in discussions, strengthen your knowledge on Linux and Windows server management!
© 2013 - 2025 Time4VPS. All rights reserved.