
frame
Howdy, Stranger!
It looks like you're new here. If you want to get involved, click one of these buttons!
Sign In RegisterHowdy, Stranger!
It looks like you're new here. If you want to get involved, click one of these buttons!
Quick Links
Categories
- 1.4K All Categories
- 7.3K General
- 6.2K General Discussions
- 412 Feature Request/Bug Report
- 545 Sales Questions and Answers
- 54 Time4VPS Life
- 242 Help requests
- 244 Server management
- 390 Tutorials
- 68 Various Tutorials
- 71 Web hosting control panels
- 133 Performance and Security
- 29 Web Applications
- 64 Linux Applications
- 25 Windows VPS


[Ubuntu OS] RunCloud installation and WordPress configuration
 Ievaz
Administrator
Ievaz
Administrator
RunCloud is a web server control panel designed to help you manage your web applications and multiple websites. This control panel in one-click allows configuring web server (Apache or Nginx); setting up WordPress, Fail2Ban and other tools; creating databases and managing them; deploying popular scripts - Joomla, Drupal, Concrete5 and many others; managing website - installing SSL certificates, configuring automatic updates and etc. Also, with RunCloud Backup, you will be able to generate the backup of your web app.
In this tutorial, I will show you how to connect your server to RunCloud and set up WordPress. However, before configuring RunCloud on your VPS, make sure your server fulfills official RounCloud requirements.
RunCloud requirements
Software requirements:
- Operating system - Ubuntu 16.04, Ubuntu 18.04 or Ubuntu 20.04 (fresh installation);
- Linux VPS with 3.10+ kernel.
Hardware requirements:
1.At least 1 core processor;
2.More than 1 GB of disk space;
3.Minimum 512 MB of RAM;
4. At least one IP address.
So if your server meets RunCloud requirements, you may follow these steps and configure RunCloud on your VPS successfully.
RunCloud configuration
- First of all, you need to create an account on RunCloud. Once the account will be created, you will need to verify your email address. Afterward, you will be able to log in to your RunCloud account.
- When you will be logged in to your account. You will be greeted by a clean dashboard and the link to connect to a new server.
2.1 So click Connect a New Server;
2.2 Then you need to choose 'Server Provider' - Others;
2.3 Click Connect via IP Address;
2.4 Now you will need to enter your custom name of the server and server's main IP address, then click Configuring your server;
2.5 You will need to choose installation type - direct installation(you will need to enter your server's root password) or manual installation (connect to your server through SSH and run bootstrapping script on your server); - When the installation will be completed, you will see an output similar to the provided output below:
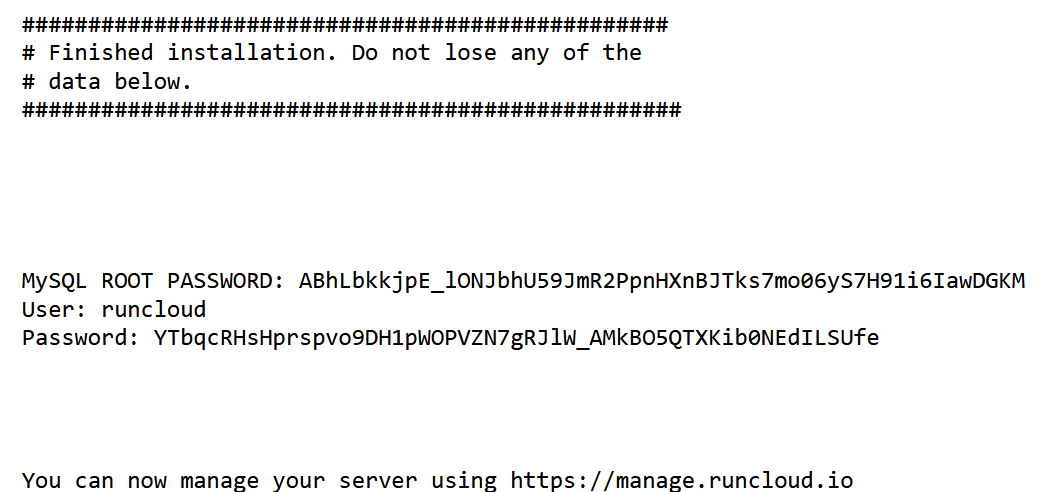
The output will provide your MySQL password and RunCloud credentials which you should save somewhere.
- Then you will be redirected to the server summary page which shows your server's resource usage, installed applications, and uptime.
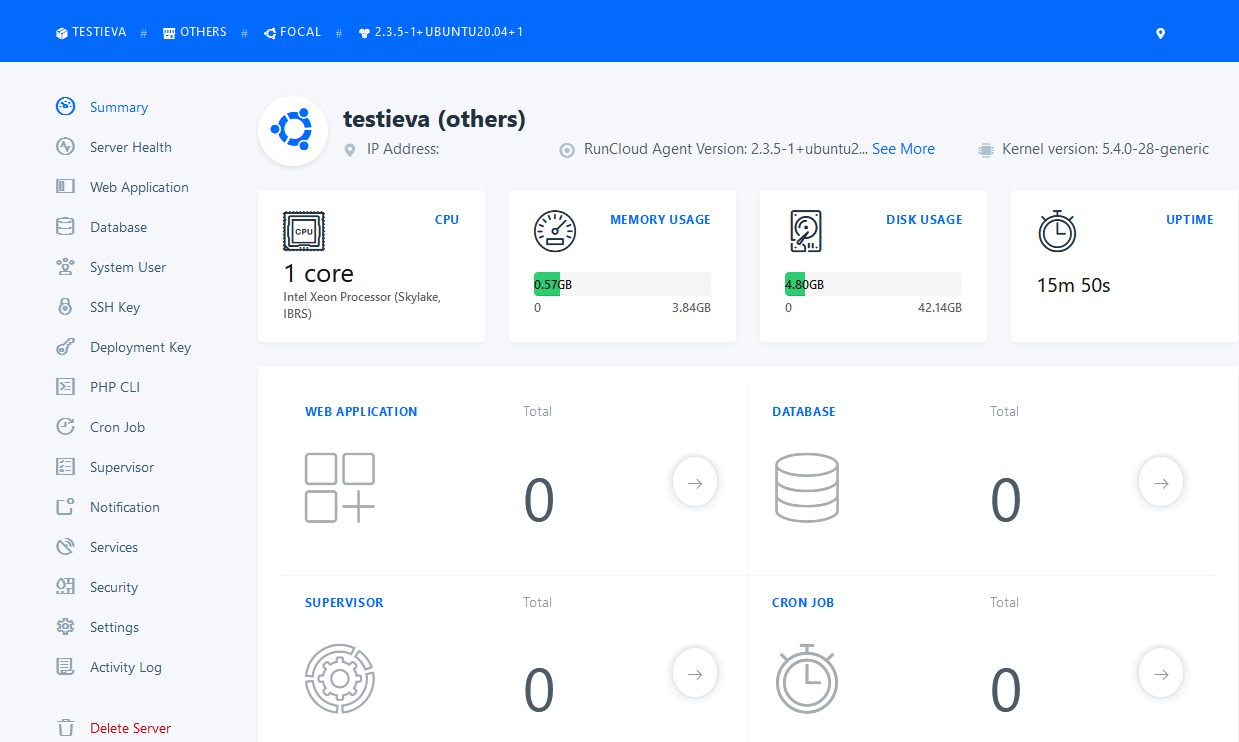
The installation might take up around 15 minutes. The script will install automatically required software and tools.
How to set up WordPress?
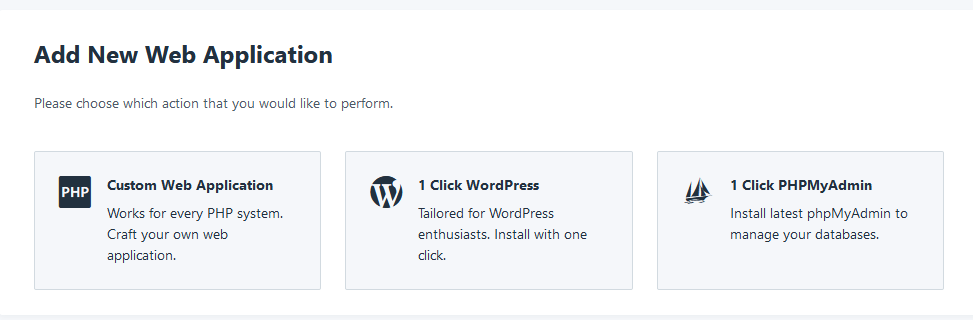
- Navigate to Web Application and then click the Create Application button to create a new web application.
- Then you get an option to create a custom web application or a WordPress application. With both options, you would be able to install WordPress. However, this guide will show how to install WordPress with the option 1 Click WordPress.
- Now you will need to fill in the required details:
3.1 Web Application Name- write your application name;
3.2 Domain Name- enter your domain name;
3.3 User- leave default username 'runcloud';
However, due to security reasons, you can create your own user System User --> Create. After creating an additional user, you can use it as User for configuring WordPress.
3.4 Public Path- leave it as it is;
3.5 PHP version- choose the PHP version that you like;
3.6 Web Application Stack- NGINX + Apache2 hybrid;
3.7 Then it will be WordPress part where you will need to write your admin username and password with which you will be accessing your WordPress website.
3.8 Fill out your database username, password, name, and table prefix - After filling in these details, you need to click Add Web Application button.
The app will be created and you will get a summary page.

Now you can visit your website and you should see the default WordPress website page. The WordPress admin page you can open with your domain or server’s IP address and adding /wp-admin. To log in, you will need to use the admin username and admin password supplied when the web app was created.
Some RunCloud web application menus
There are areas for managing web app settings:
SSL/TLS - you can issue for your domain SSL certificate - free Let's Encrypt or custom certificate.
File Manager - you can access your website files and manage them - change permissions, rename, delete or modify programming code.
Settings - it will let you change the PHP, web server setting, and environment configuration.
Web Server Log - these logs will let you see all access or the error logs.
Activity Log - this is the log that records all activity for your Web Application.
Tools - it allows changing or fixing file or directory ownership permissions.
Since RunCloud comes with a list of rich features for optimizing your server, it will help you to save your time and configure the server much easier. For more information about RunCloud and how to manage it, you can find here.
foot
Feel free to join our constantly expanding community, participate in discussions, strengthen your knowledge on Linux and Windows server management!
© 2013 - 2025 Time4VPS. All rights reserved.