frame
Howdy, Stranger!
It looks like you're new here. If you want to get involved, click one of these buttons!
Sign In RegisterHowdy, Stranger!
It looks like you're new here. If you want to get involved, click one of these buttons!
Quick Links
Categories
- 1.4K All Categories
- 7.3K General
- 6.2K General Discussions
- 412 Feature Request/Bug Report
- 545 Sales Questions and Answers
- 54 Time4VPS Life
- 242 Help requests
- 244 Server management
- 390 Tutorials
- 68 Various Tutorials
- 71 Web hosting control panels
- 133 Performance and Security
- 29 Web Applications
- 64 Linux Applications
- 25 Windows VPS
[Ubuntu] How to Install Minecraft Server
 Lawrence
Member

Introduction
Minecraft is a sandbox video game. The creative and building aspects of Minecraft enable players to build constructions out of textured cubes in a 3D procedurally generated world. Other activities in the game include exploration, resource gathering, crafting, and combat.
This tutorial will show you how to set up personal Minecraft Server, here on Time4VPS.
Requirements
In this tutorial we will be using Ubuntu 16.04, however you should be able to use all our offered Ubuntu and Debian versions.
In Time4VPS you are able to install Ubuntu 16.04 template really easy and fast, only with few mouse clicks:
- Login to the Client Area;
- Select at the top of menu the "My Services > VPS" tab;
- Press the "Manage" button at the service table;
- Press the "Install OS" button;
- Choose Ubuntu 16.04 operating system, agree with warning and press "Continue";
- Wait for 5-10 minutes and refresh VPS management page.
Update System
First things first. Like always, first of all, we recommend to update and upgrade your server.
apt-get update
apt-get upgrade -y
Install OpenJDK
Install OpenJDK, an open-source implementation of Java, and the GNU Screen package by running this command:
apt-get install openjdk-8-jre-headless screen
Creating New User
Create a new user for Minecraft by running:
adduser minecraft
Grant the created user "sudo" rights:
usermod -a -G sudo minecraftSwitch to the minecraft user:
su minecraft
Install Minecraft
Download the latest version of the Minecraft Multiplayer Server:
wget https://s3.amazonaws.com/Minecraft.Download/versions/1.11.2/minecraft_server.1.11.2.jar
Note: You can find latest version on official Minecraft's webpage.Create a script to run the Minecraft server by create file /home/minecraft/run.sh
nano /home/minecraft/run.shand pasting in this code:
#!/bin/sh
BINDIR=$(dirname "$(readlink -fn "$0")")
cd "$BINDIR"

java -Xms1024M -Xmx1536M -jar minecraft_server.1.11.2.jar -o true
Note: The Xms and Xmx flags define the minimum and maximum amount of RAM the Minecraft server will use. The settings above are recommended for package "M", which has 2 GB of RAM used solely for this purpose. Adjust these values to fit your needs.And last but not least make run.sh executable:
chmod +x /home/minecraft/run.sh
Run Minecraft
The first time you run the Minecraft server it will create an EULA file and then exit:
./run.shOpen the eula.txt file and change the value of eula to true:
nano /home/minecraft/eula.txtTo ensure that the Minecraft server runs independent of an SSH connection, execute run.sh from within a GNU Screen session:
sudo screen /home/minecraft/run.sh
Note: To disconnect from the screen session without stopping the game server, press CTRL+a and then d. To resume the running screen session, use the command screen -r.
Connect to your Minecraft Server
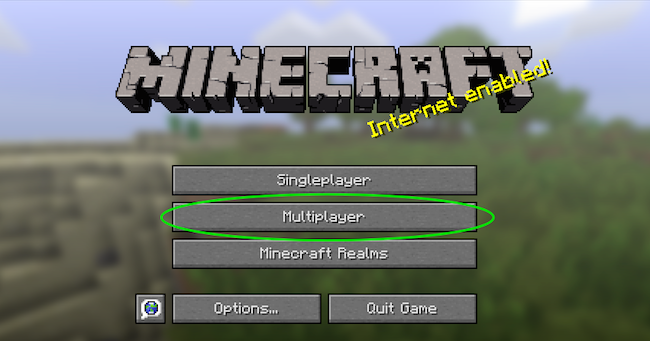
Open your local Minecraft client. After logging in, click on the Multiplayer option:

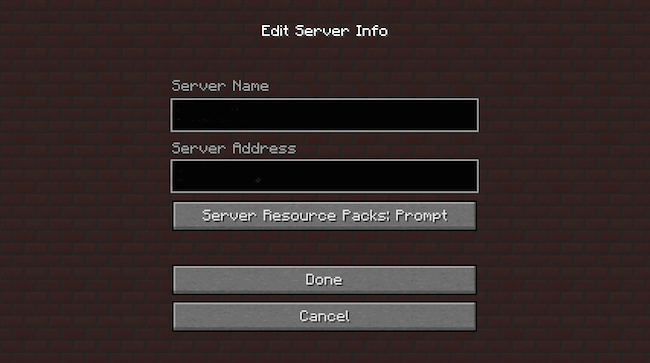
Click on Add server and enter your server's IP address or hostname. When you’re finished click Done:

Your server is now available to incoming connections. Click Join Server to connect.
Conclusion
Now you have your own private Minecraft server on which you can play with your friends from wherever you are. We recommend to take a deep look at all possible configurations, mods and so on which you can implement on your Minecraft word to increase your joy of playing even more.
Tagged:


